Mods in Minecraft change the game content and can provide a new experience for players who might be bored with the vanilla game, with new and sometimes game-breaking mechanics and items. Modding is a relatively simple task, and once set up, you can easily add and remove mods.
Some popular and easy mod loaders are Forge and Fabric, while the lesser-known ones include Quilt and NeoForge. In this article, we will discuss the latter.
Quilt
As a relatively newer mod loader, it learns from the shortcomings of its predecessors and aims to be simpler for developers. Any mod made for Fabric can also be used on it because it is based on the previously mentioned Fabric mod loader.
Installation
To install Quilt, download the Universal.jar file from their official website. https://quiltmc.org/en/install/client/

Next, open the downloaded file, which should look like this, and select your desired Minecraft version from the drop-down menu before clicking Install.

A prompt like this should appear, confirming that the installation was successful.

Press “OK” and open the Minecraft launcher, where you should see the Quilt loader in the drop-down menu.
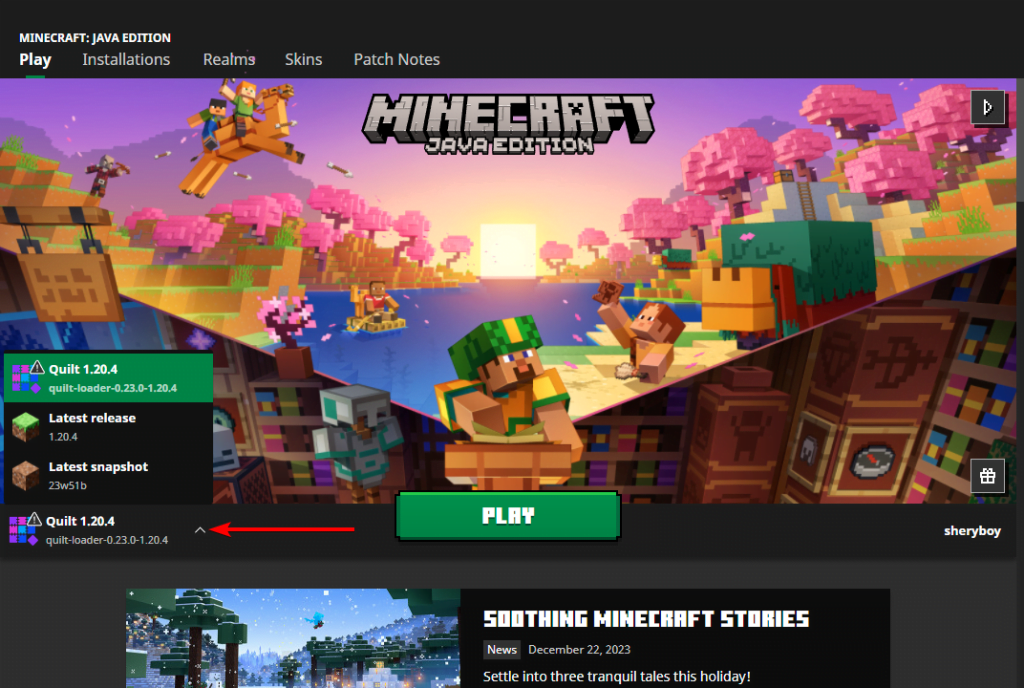
Now that Quilt has been installed, you can install any fabric or quilt mod you choose.
Installing Mods
You need to download a mod from any website, such as CurseForge or Modrinth, to install it. In this guide, we will install the sodium mod, which improves game performance.
Next, open the Minecraft launcher and click on the Installations tab.

Here, you can click on the folder icon to open up the Minecraft directory.

Here, you should see a mods folder; if there is no such folder, you can create a new folder and name it “mods.”
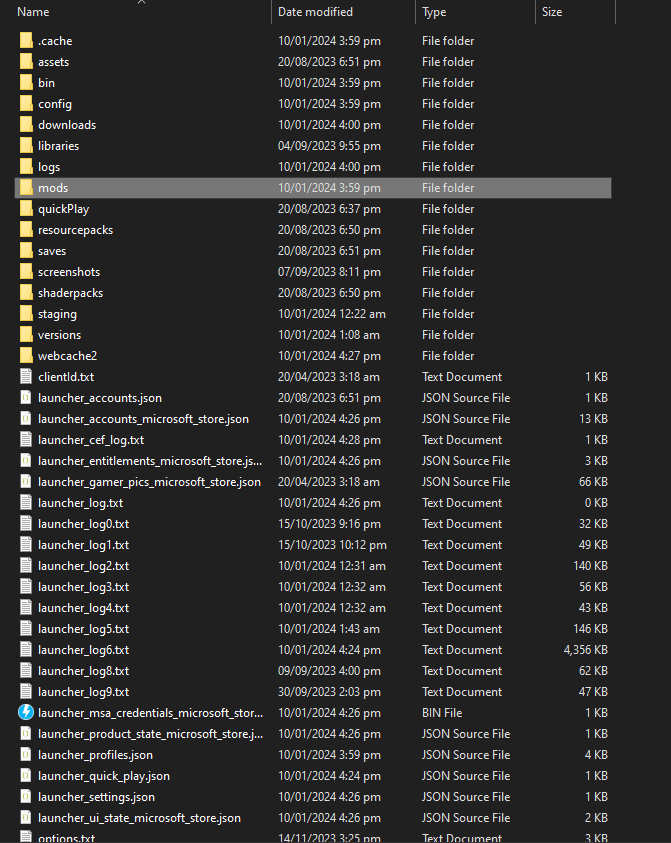
Open this folder and put the mod that you have downloaded in it.

Now, you can open Minecraft and start playing with your favorite mods.
We have successfully set up Quilt to run with any mods, but it should be noted that the Quilt mod loader is still in beta, so you may face some issues that should be reported to their website so they can be fixed.
NeoForge
As a newly released fork of the most popular mod loader, Forge, it provides the users and mod developers with a familiar interface. It was developed by the original team of Forge, who left after some tensions and complications between the whole modding community and their lead developer, “LexManos.” As of Minecraft 1.20.1, any mod developed for Forge can be used for NeoForge, but in newer versions, that would not be the case, and mods for NeoForge would be separate.
Installation
To install the latest version of NeoForge, head over to their official website, https://projects.neoforged.net/neoforged/neoforge, and select the desired Minecraft version from the dropdown menu before clicking on the download button.

Next, open the downloaded file, which should look like this, and make sure the Install client option is selected before clicking Proceed.
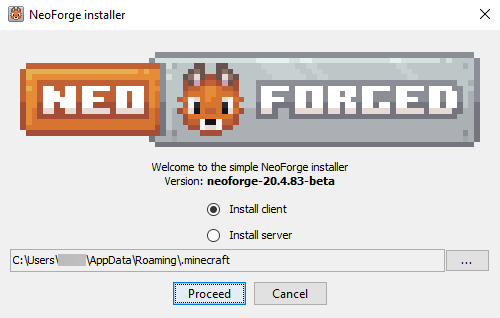
Let it proceed, and a dialogue box like this should appear, prompting that the installation was successful.

Now open the Minecraft launcher, and you should see that NeoForge has been installed.#
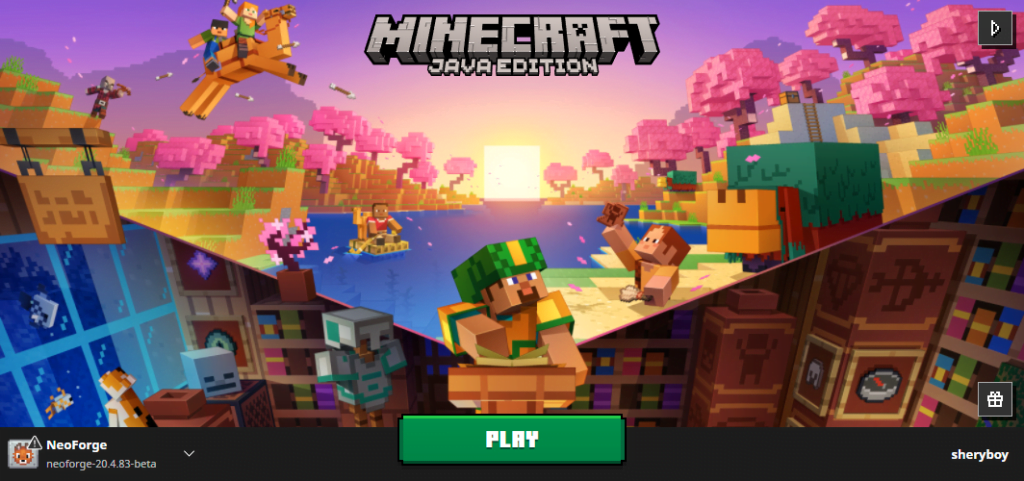
Now that NeoForge has been successfully installed, you are ready to download some mods.
Installing Mods
First, download a mod from any website like CurseForge or Modrinth to install it. Make sure the NeoForge mod loader supports it. For this guide, we will install the Journey map mod.
Next, open the Minecraft launcher and click on the Installations tab.
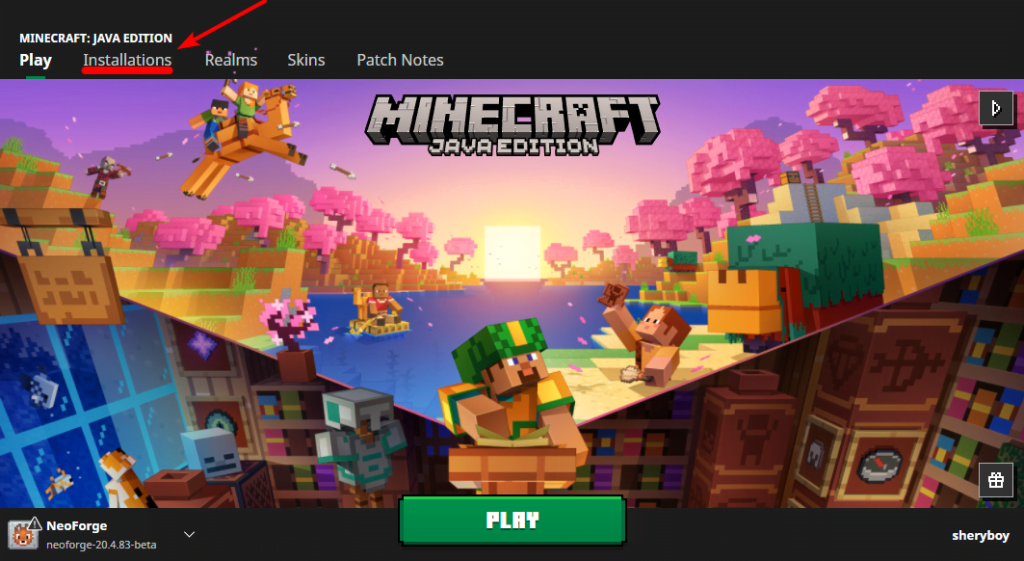
Now click on the folder icon to open up the Minecraft directory.

Now open the mods folder and put the mod file into that folder.

You can now open Minecraft and start playing with your favorite mods.
Now that we have successfully installed NeoForge, you can run any mods you want. Backed by the original Forge team, NeoForge is on track to be one of the best mod loaders out there—with newer mods being added every day.

