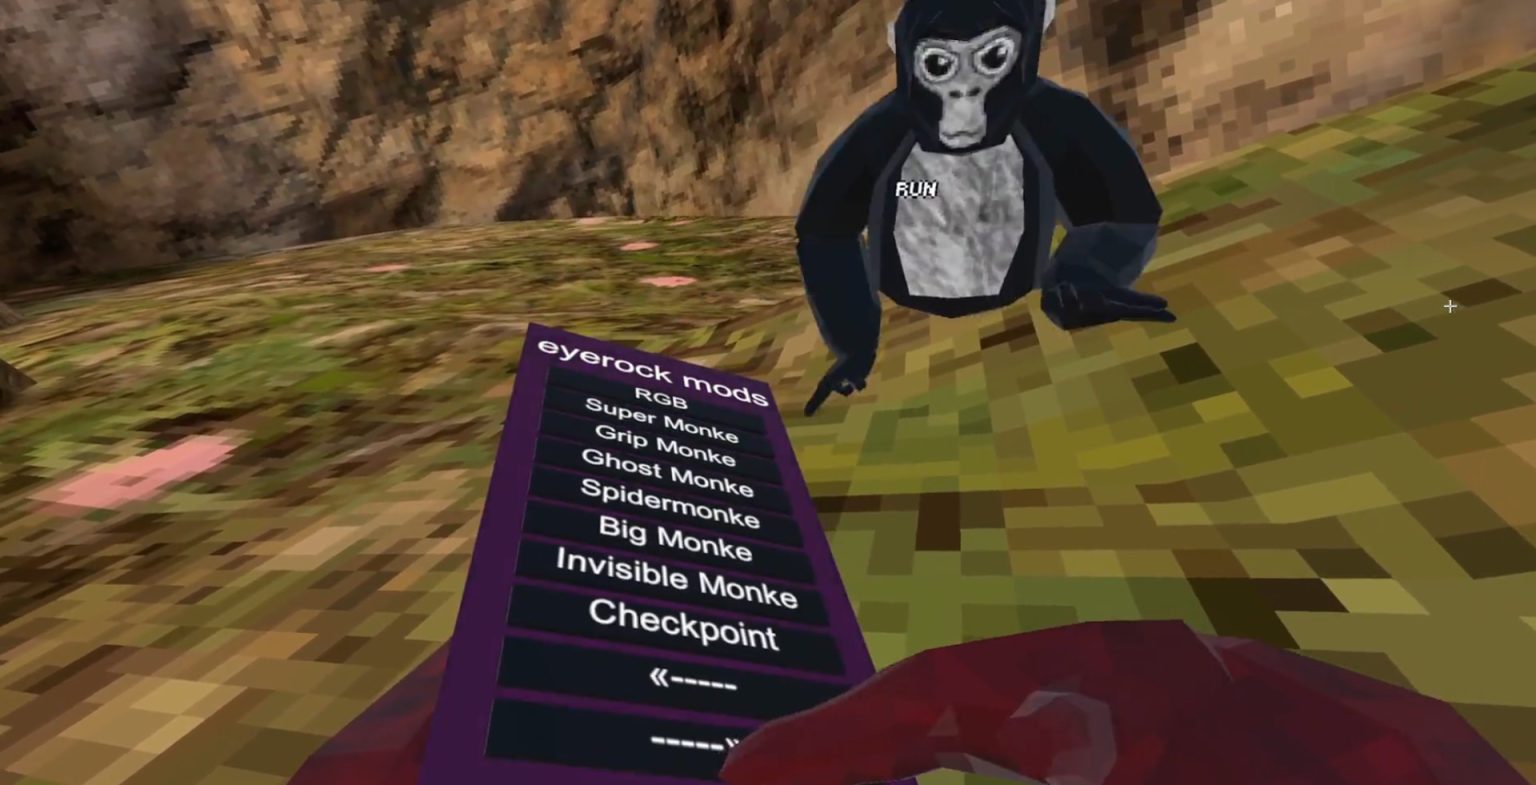
So you want to start modding Gorilla Tag? This detailed guide should help you download & install mods in Gorilla Tag. But first you need to keep in mind a few things which are:
- Not all mods are allowed: Some mods like mod menus are “illegal” because they work in public lobbies. The exception to this is the “HauntedModMenu”, “Bark”.
- Quest modding is currently down: That means you can only mod on the Steam PC version. This situation might change later on, if it does we will update this article.
Now that we have important information out the way, let’s get started!
Step 1. Download the MonkeMod Manager
“MonkeModManager” is a manager for your Gorilla Tag mods, it downloads required mod files like “BeplnEx” to make all of your mods work.
Remember all mods need to be put in the plugins folder (We will tell you where that is a little later)
At first “MonkeModManager” might look harmful to your computer, since your computer does block you from opening it for the first time, but know that it is not harmful to your computer at all, it’s an open-source utility and it is from a reputable source.
It is downloaded by many users, and there have been no official reports of PC infections from “MonkeModManager” as per KasperSky.
- You have to download “MonkeMod Manager”, you can get it from their official GitHub.
- Once you are in the website, click on “MonkeModManager.exe”
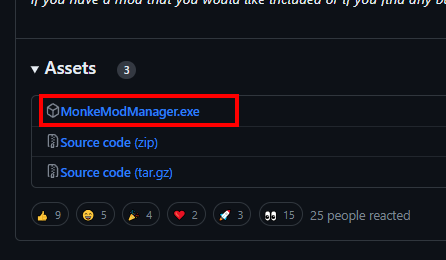
- Open the file that you downloaded, it should be called “MonkeModManager.exe”. At first your computer will throw a blue window saying that it is a virus. Again it is not harmful to your computer. On the blue window: simply click on the “More Info” and click the “Run anyway” button.
- Once you have opened the file, you should see something like this:
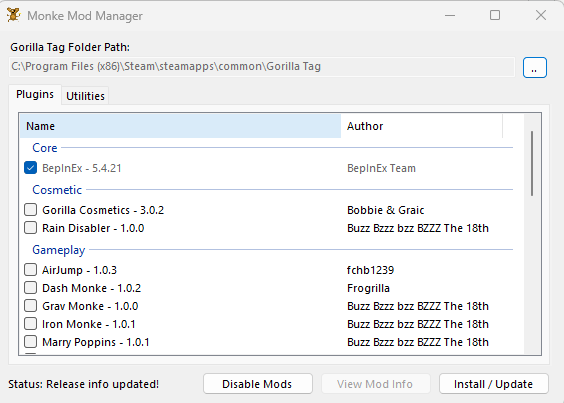
For now just click the “Install / Update” button. Then as you can see in the picture, there are lots of mods that you can pick from the manager itself.
To pick a mod in the manager, make a checkmark next to the mod that you want.
Note: Some mods may not work depending on whether they have been getting updated or not.
Step 2. Downloading Mods for Gorilla Tag
To do this, you first need to join the Gorilla Tag Modding Server on Discord, once you join the Discord server simply head to #pc-mod-releases channel and download a mod of your choice out of the server. I will be using the “Bark” mod to demonstrate.
- Click the GitHub link provided in the Discord post of your selected mod
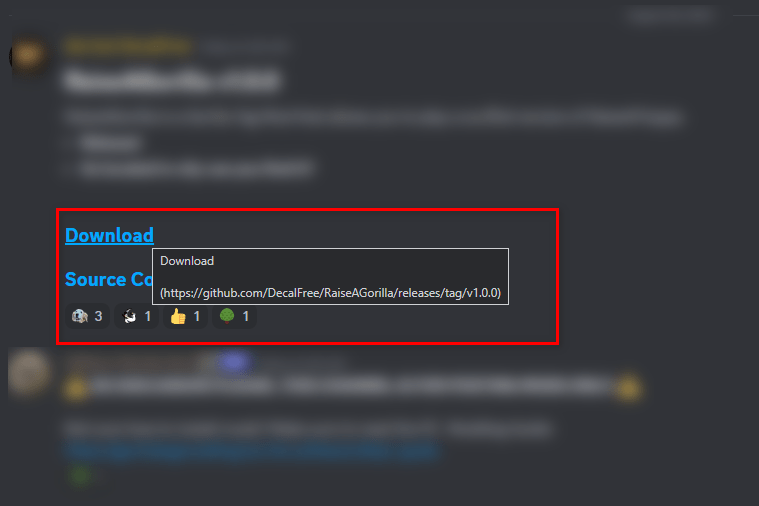
- Now download the mod files from GitHub
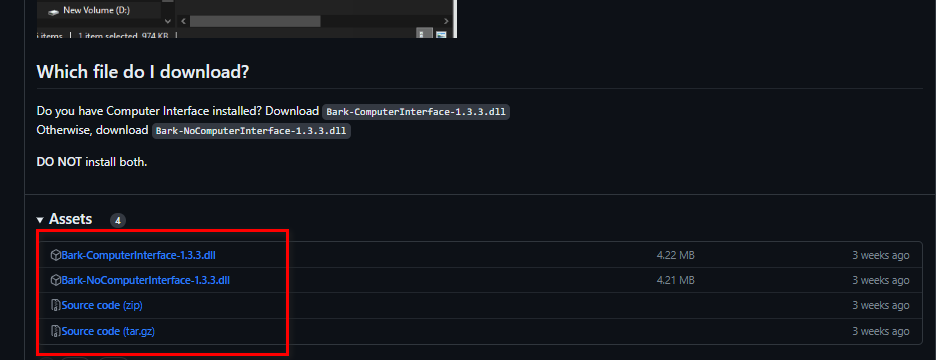
Note: Some links immediately download the mod without redirecting you to GitHub, if that happens, just skip this step. It’s totally fine because these files are hosted directly on Discord’s Server.
- Open “MonkeModManager” and navigate to “Utilities” on the top and then click the “Beplnex Folder” button.
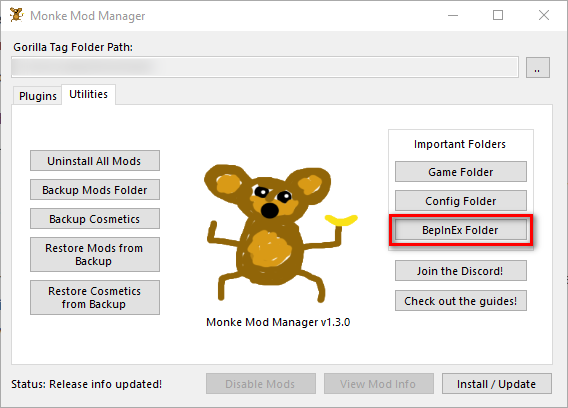
- The button you clicked should have opened a window like this:
When you see this, click the “plugins” folder. Then open another File Explorer window, and go to the place where you downloaded the mod from the Discord server, and drag it into the “plugins” folder.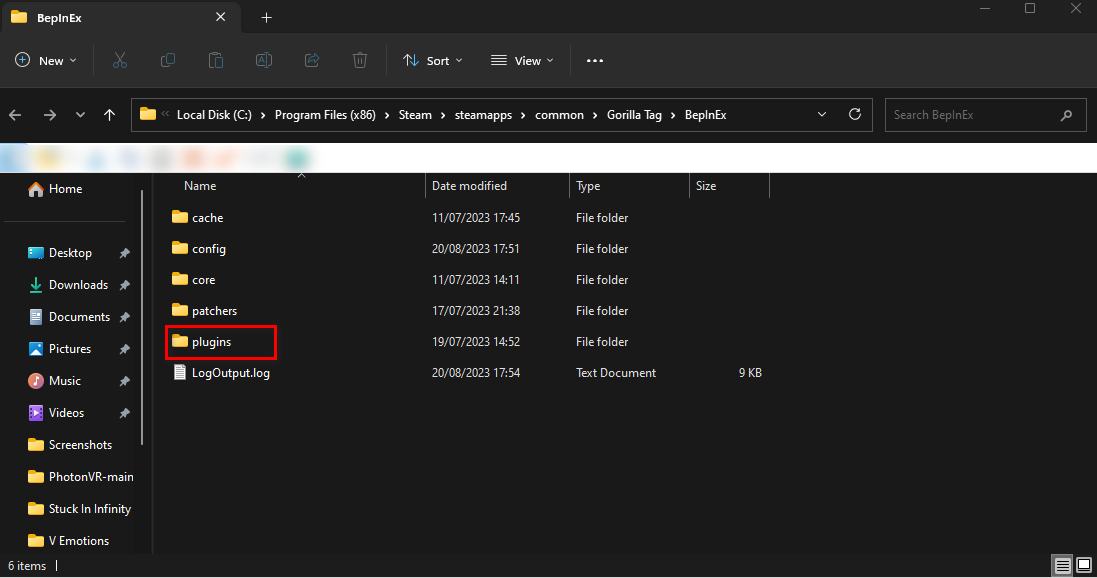
Note: Always read the mod post in GitHub, the mod you downloaded might depend on other mods to work properly.
To know which other mods to dependencies to install, you need to read the mod post on the server, or the GitHub release.
If you also need to figure out the controls for the mod. All of the information of the mod should be either in the GitHub page, or the mod post itself in the Discord Server.

